Solar Panel Installation Process UK:
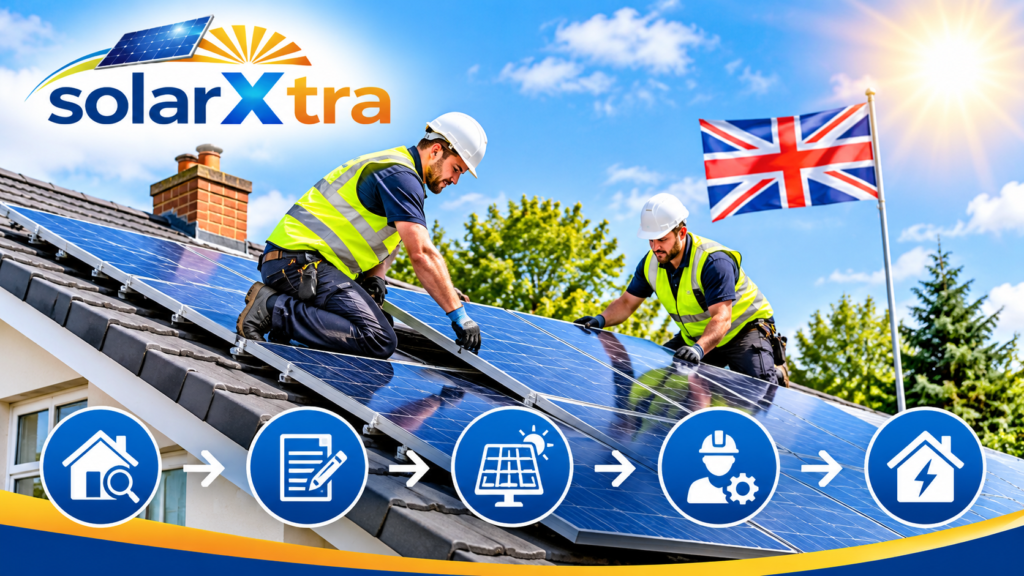
Solar Panel Installations Process UK: What Should You Expect?
Installing solar panels is a practical way for UK homeowners to generate electricity from sunlight and reduce their reliance on energy suppliers. However, the process involves more than simply fixing panels to a roof. It requires property assessment, system design, electrical planning, professional installation, safety checks and final commissioning.
Understanding the solar panel installation process in the UK helps homeowners prepare for each stage and make informed decisions about their renewable energy system.
At Solar Xtra, the solar panel fitting & installation journey can be explained through the following stages, from the first enquiry to switching on your solar energy system.
Step 1: Initial Consultation and Energy Requirements
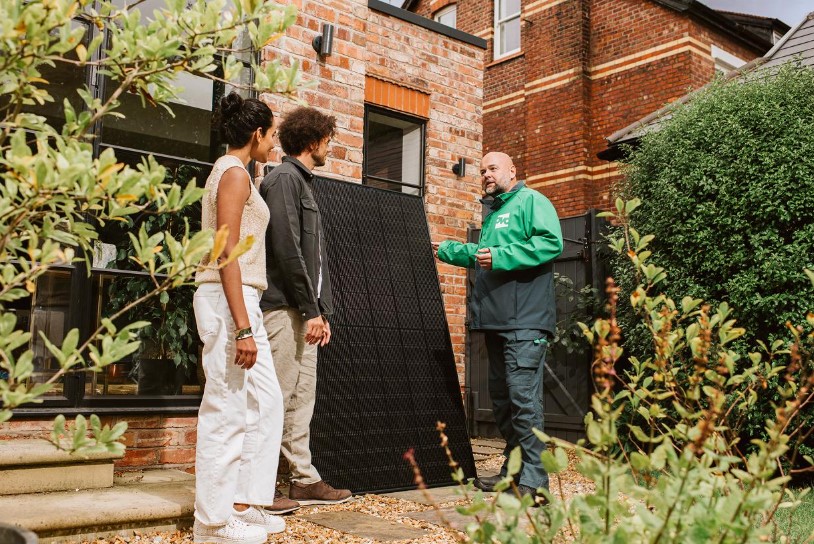
The first stage is understanding your property’s energy requirements and determining whether solar panels are a suitable option.
A professional solar installer will usually discuss your electricity consumption, property type, roof condition and future energy requirements.
During the initial consultation, you may be asked about:
- Your average monthly and annual electricity consumption.
- The number of people living in your household.
- Your current electricity bills and tariff.
- Your daytime and evening electricity usage.
- Whether you want to install solar battery storage.
- Plans for future electrical equipment, such as an electric vehicle charger.
- Your preferred installation budget.
This information helps determine the appropriate solar PV system size for your household.
For example, a family that uses electricity throughout the day may benefit from a different solar system configuration than a household where most electricity consumption takes place in the evening.
The objective is to select a system that matches your actual energy requirements rather than installing more solar panels than your property needs.
Step 2: Solar Panel Site Survey and Roof Assessment
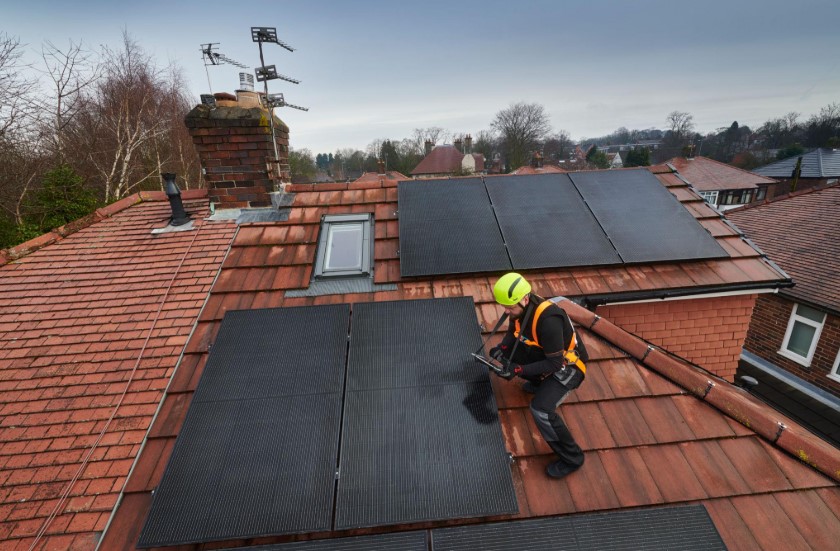
After the initial consultation, the next stage is a solar panel site survey. This assessment helps installers understand the physical condition of your property and identify any challenges that could affect the installation.
A site survey may involve a physical inspection, measurements, photographs and an assessment of the property’s electrical infrastructure.
What does the installer check?
1. Roof condition
The installer checks whether your roof is structurally suitable for solar panels. Roof tiles, rafters, existing damage and the general condition of the roof are important considerations.
If repairs are required, they should be considered before the solar mounting system is installed.
2. Roof direction and orientation
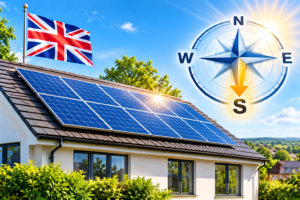
The direction your roof faces affects the amount and timing of electricity generated.
South-facing roofs can provide strong solar generation across the day, while east-facing and west-facing roofs can also be suitable depending on household consumption and system design.
3. Roof angle and available space
The roof pitch and available installation area help determine the number and arrangement of solar panels.
4. Shading assessment
Nearby trees, chimneys, neighbouring buildings and other obstructions can reduce solar generation.
Installers consider shading patterns when selecting panel positions and system components.
5. Electrical system inspection
The installer checks your consumer unit, electrical connections, cable routes and available space for the inverter and battery.
6. Battery installation location
If you want solar battery storage, the installer also assesses a suitable location with appropriate access, ventilation and manufacturer-required clearances.
A detailed survey helps prevent unexpected problems during installation and allows the system design to reflect the property’s actual conditions.
Step 3: Solar System Design and Equipment Selection
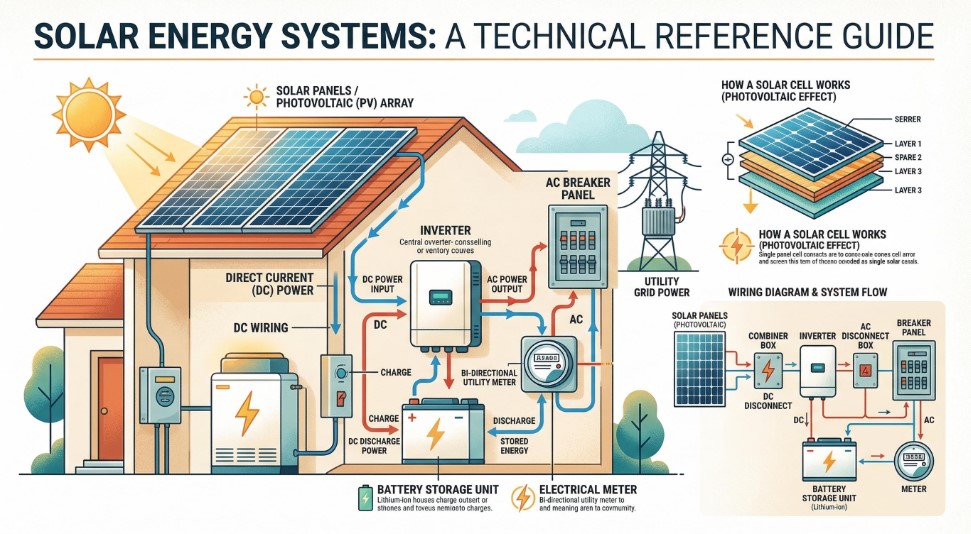
Once the property assessment is complete, the installer prepares a suitable solar system design.
This stage determines how the solar panels, inverter, mounting equipment, electrical connections and optional battery storage will work together.
The design should consider your electricity consumption, roof layout, shading conditions and available installation space.
What equipment is included in a solar panel system?
1. Solar panels
Solar photovoltaic panels capture sunlight and convert it into direct current (DC) electricity.
The number of panels depends on their individual output, available roof space and the required system capacity.
2. Solar inverter
A solar inverter converts the DC electricity produced by solar panels into alternating current (AC) electricity used by household appliances.
The installer selects an inverter with suitable capacity and compatibility for the proposed system.
3. Mounting system
Solar mounting rails, brackets and roof fixings secure the panels to the roof.
The mounting system must be suitable for the roof material and installation design.
4. Solar battery storage
A solar battery stores surplus electricity generated during the day so it can be used later when solar production is lower.
This can help households make greater use of their own solar electricity, particularly during the evening.
5. Monitoring equipment
Solar monitoring systems allow homeowners to check electricity generation, system performance and, where supported, battery charging and household energy consumption.
Choosing the right solar panel technology
The installer may recommend different panel technologies depending on your budget, available space and energy requirements.
| Solar panel type | Main characteristics |
|---|---|
| Monocrystalline | High efficiency and a space-efficient design |
| Polycrystalline | Traditionally a more budget-focused panel technology |
| Bifacial | Can generate electricity from light reaching both panel surfaces |
| All-black panels | Aesthetic design often selected for residential roofs |
The final equipment selection should be based on product specifications, warranties, compatibility and expected system performance.
Step 4: Quotation, Installation Planning and Permissions
After the system design, you should receive a detailed quotation explaining the proposed installation.
A good quotation should clearly identify the equipment, installation work, system capacity, estimated generation and associated costs.
What should your solar installation quotation include?
- Number and type of solar panels.
- Total solar PV system capacity.
- Inverter make, model and capacity.
- Solar battery specifications, if included.
- Mounting equipment and electrical components.
- Scaffolding and installation costs.
- Electrical testing and commissioning.
- Relevant certification and handover documentation.
- Product and workmanship warranties.
- Estimated installation schedule.
Do you need planning permission for solar panels in UK?
Many domestic rooftop solar installations can proceed under permitted development rights, meaning a full planning application may not be required.
However, exceptions can apply to listed buildings, conservation areas, scheduled monuments and properties subject to specific planning restrictions.
Planning rules can also differ between England, Scotland, Wales and Northern Ireland.
In England, permitted development rules for solar equipment were updated on 27 August 2026, with a transitional period running until 27 August 2027. Homeowners should check which rules apply to their proposed installation. Planning Portal+2
Before work begins, ask your installer to check the relevant local planning requirements.
What about building regulations?
Solar panel installations must meet applicable building regulations and electrical safety requirements.
Roof loading, structural suitability and electrical work should be assessed as part of the project. Your installer should explain how the relevant compliance and notification requirements will be handled.
Step 5: DNO Application and Grid Connection Requirements
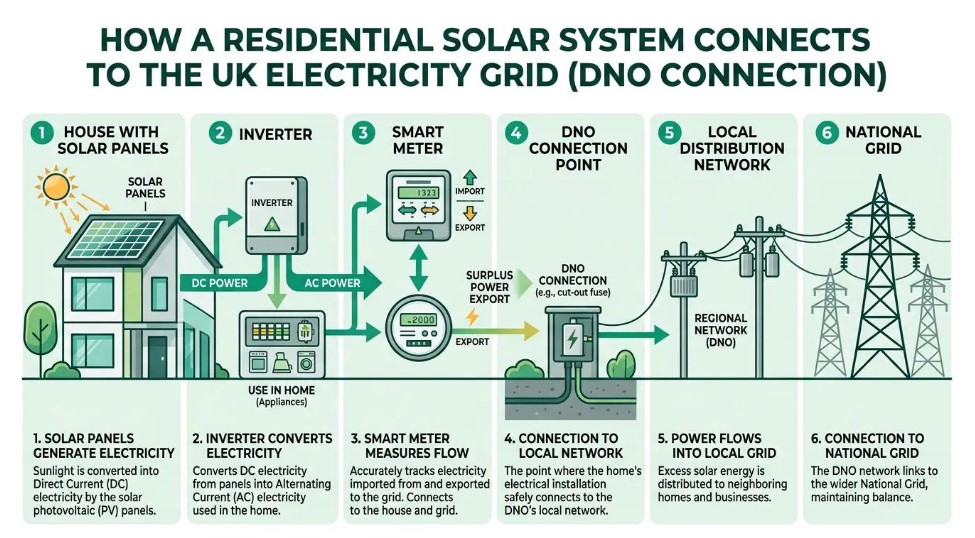
An important part of the UK solar installation process is notifying or obtaining approval from your local Distribution Network Operator (DNO).
The DNO manages the electricity distribution network supplying your property. It needs relevant information about electricity-generating equipment connected to that network.
The connection process generally depends on the proposed system’s electrical capacity and configuration.
What are G98 and G99 applications?
G98 connection
G98 generally covers qualifying small-scale generation installations that meet the relevant technical requirements. For a typical single-phase domestic connection, the threshold is 16 amps per phase, equivalent to approximately 3.68 kW.
Where the installation qualifies, the installer can generally install and commission the equipment before notifying the DNO within the required 28-day period.
G99 connection
G99 generally applies to generation installations outside the G98 notification criteria.
In these cases, the installer must submit the required application and receive the necessary DNO approval before installing or connecting the relevant generating equipment.
The exact requirements depend on the system, electrical supply and network conditions. GOV.UK+1
| Requirement | G98 | G99 |
|---|---|---|
| General purpose | Qualifying small-scale generation | Larger or otherwise out-of-scope generation |
| Application process | Install and notify | Apply before installation |
| DNO involvement | Notification | Prior assessment and approval |
| Typical use | Smaller domestic systems | Larger or more complex systems |
Important: Your installer should determine the correct connection procedure before work starts. Do not assume every household solar installation follows the same DNO process.
Step 6: Preparing Your Property for Installation
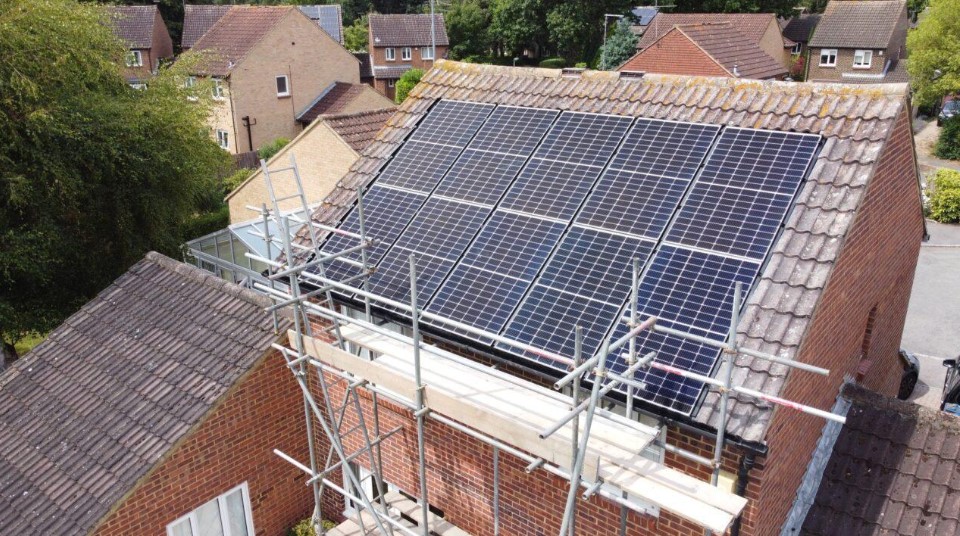
Once the system design and necessary approvals are in place, the installation team prepares your property.
This stage helps ensure that the installation can proceed safely and efficiently.
Preparation may include:
- Arranging scaffolding to provide safe roof access.
- Checking the delivery of solar panels and equipment.
- Preparing the roof mounting locations.
- Confirming cable routes between the panels and inverter.
- Identifying the inverter and battery installation locations.
- Protecting the areas where installers will work.
- Confirming access to the consumer unit and electrical connections.
Scaffolding is commonly required for pitched residential roofs, although the exact access arrangements depend on the property.
How can homeowners prepare?
You can make installation day easier by ensuring that the installation team has access to the relevant areas.
Move vehicles if necessary, clear access to the loft and electrical equipment, and discuss any access restrictions with your installer beforehand.
You should also ask whether electricity will need to be temporarily switched off during the electrical connection work.
Step 7: Installing Solar Panels on Your Roof
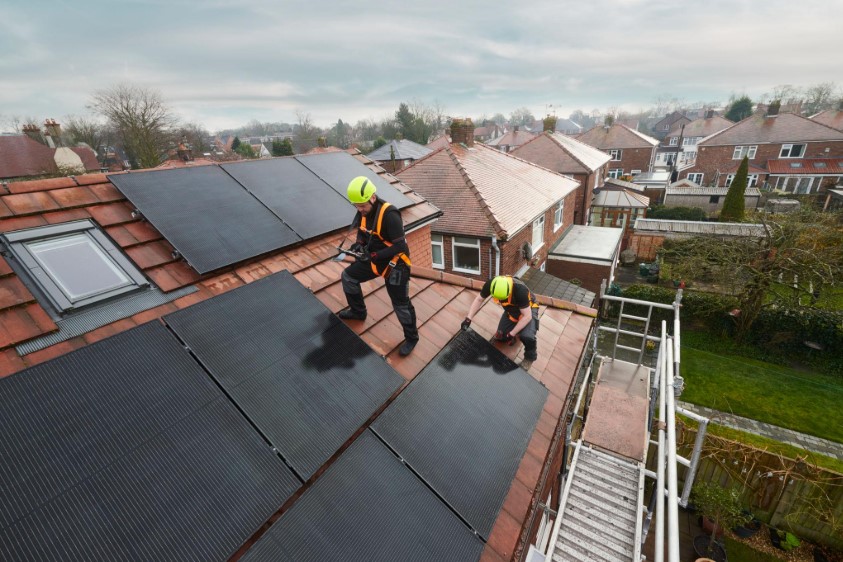
This is the main physical stage of the solar panel installation process UK.
The installation team begins fitting the mounting equipment and securing the solar panels according to the approved system design.
The precise method depends on your roof construction and the selected mounting system.
How are solar panels fitted?
1. Roof preparation
Installers identify the appropriate fixing points and prepare the roof for the mounting equipment.
2. Installing roof brackets
Suitable roof anchors or brackets are secured to the roof structure. The installation method depends on the roof covering and structural arrangement.
3. Fitting mounting rails
Rails are attached to the roof fixings to create a stable structure for the solar panels.
4. Positioning solar panels
The solar panels are carefully lifted onto the roof and positioned according to the approved layout.
5. Securing the panels
Specialist clamps and fixings secure the panels to the mounting rails.
6. Connecting solar panels
The panels are connected using suitable electrical connectors and wiring. The installer arranges the string configuration and any required protection equipment according to the system design.
Will solar panel installation damage my roof?
A professionally planned installation should use suitable roof fixings and installation techniques to protect the roof covering.
However, the condition of the existing roof is important. Damaged tiles, weak structures or unsuitable fixing points should be addressed before installation.
Your installer should explain how roof penetrations, weatherproofing and mounting arrangements will be handled.
Step 8: Solar Inverter and Battery Storage Installation
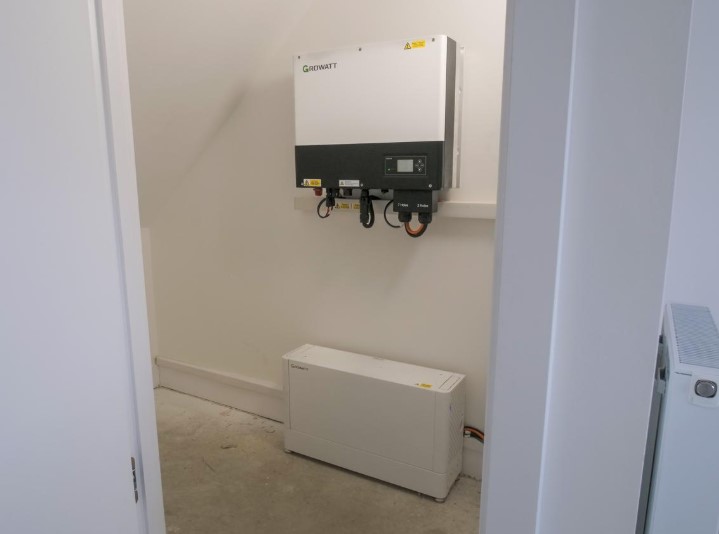
Once the solar panels are installed, the team proceeds with the electrical components.
The solar inverter installation is an essential part of the project because the inverter converts the electricity generated by the panels into a form that household appliances can use.
The inverter is normally installed in a suitable location, such as a garage, utility room or another approved area.
What happens during inverter installation?
- The installer identifies a suitable mounting location.
- The inverter is securely fixed in place.
- DC cables from the solar panels are connected.
- AC electrical connections are completed.
- Appropriate electrical protection and isolation equipment are fitted.
- The inverter is configured and prepared for commissioning.
How is solar battery storage installed?
If you have selected a solar battery, it is installed and connected according to the manufacturer’s requirements and the approved system design.
The battery stores surplus solar electricity for later use.
For example, during sunny periods, your panels may generate more electricity than your household needs. Instead of exporting all the surplus electricity to the grid, a compatible battery system can store some of it for evening consumption.
Battery systems can also provide information about charging levels, electricity usage and available stored energy.
Your installer should explain whether the battery is AC-coupled or DC-coupled, how it operates with the inverter and whether any export limitations apply.
Step 9: Electrical Testing, System Commissioning and Safety Checks
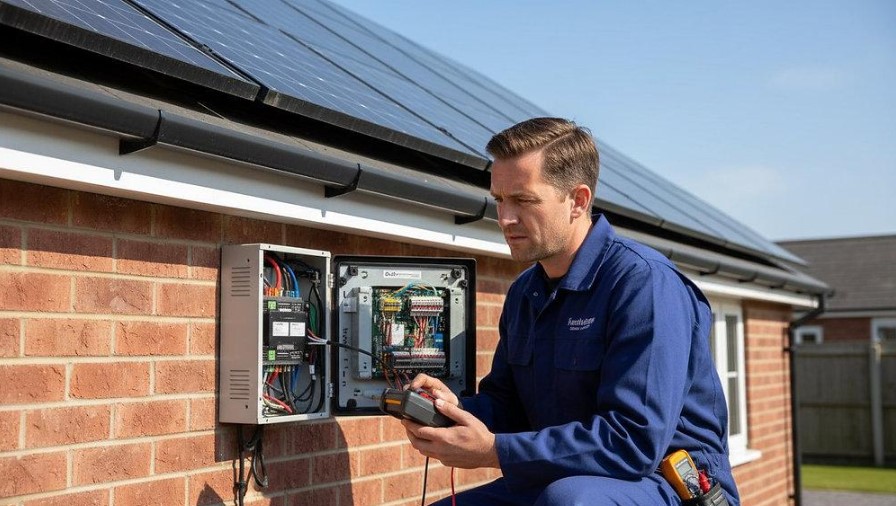
After all equipment has been installed, the electrician carries out the required electrical tests and commissioning procedures.
This is a crucial stage because the system must be checked before it is placed into normal operation.
What happens during solar panel commissioning?
- Checking the solar panel wiring and electrical connections.
- Testing the DC and AC circuits.
- Verifying inverter configuration.
- Checking electrical protection and isolation devices.
- Confirming that the system operates within its designed parameters.
- Testing battery communication and operation, where installed.
- Checking monitoring equipment and communication connections.
- Confirming that the system is generating electricity correctly.
The installer should also explain any safety switches and isolation points so that you know how to operate the system safely.
Once the required checks are completed and the relevant connection requirements have been satisfied, the solar system can be commissioned for normal operation.
Step 10: Certification, Documentation and Final Handover
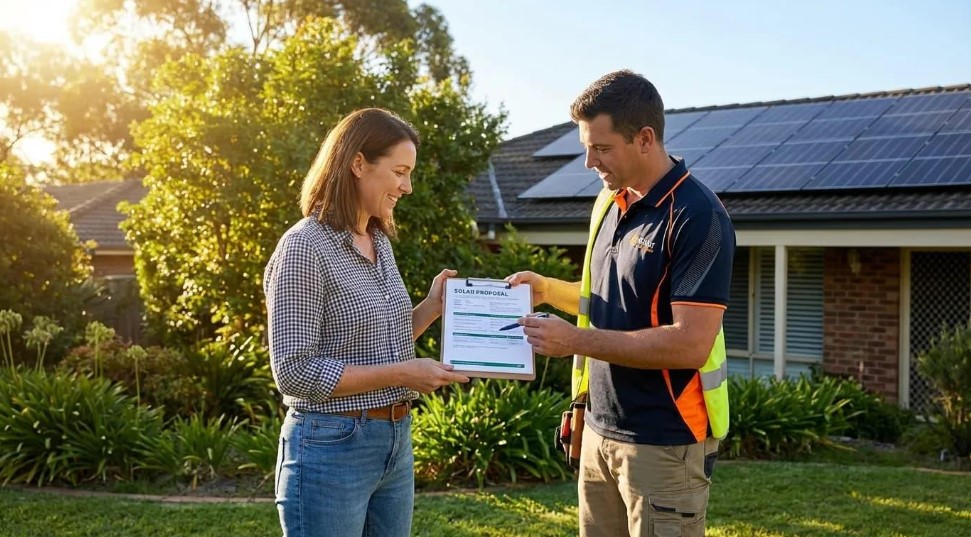
The solar energy installation process does not finish when the solar panels are switched on. You should also receive the relevant documentation confirming the work, equipment and system details.
Your installer should explain which certificates and records apply to your particular installation.
Important documents to request
| Document | Why it matters |
|---|---|
| MCS certificate, where applicable | Evidence of an MCS-certified installation |
| Electrical installation certificate | Records relevant electrical work and testing |
| DNO notification or approval | Evidence of the required grid connection process |
| Building regulations compliance documentation | Records relevant building regulations compliance |
| Product warranties | Explains equipment warranty coverage |
| Workmanship warranty | Explains installation workmanship coverage |
| System design and specifications | Records the installed system configuration |
| User manuals | Explains how to operate the equipment |
Government guidance explains that installers must follow the relevant registration, notification and documentation procedures for domestic solar PV and battery installations. GOV.UK+1
What is MCS certification?
The Microgeneration Certification Scheme (MCS) is a certification scheme associated with renewable energy products and installation standards.
Using an appropriately certified installer and eligible equipment can be important when applying for certain export arrangements and demonstrating installation quality.
Ask your installer whether the installation and equipment qualify for the relevant MCS certification.
Step 11: Solar Monitoring and Smart Export Guarantee Registration
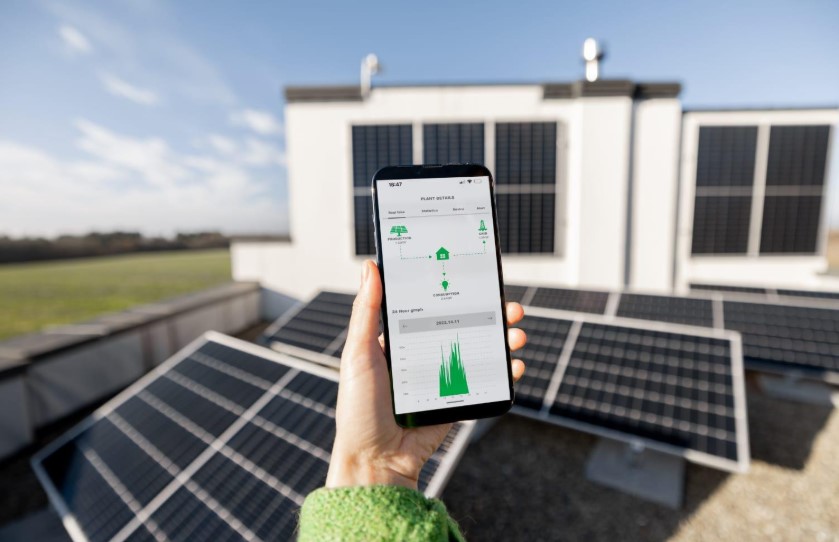
After commissioning, you can begin monitoring your solar energy system.
Many modern inverters provide monitoring applications that allow homeowners to view electricity generation and system performance.
Depending on your equipment, you may be able to monitor:
- Daily solar electricity generation.
- Monthly and annual energy production.
- Household electricity consumption.
- Battery charging and discharging.
- Electricity exported to the grid.
- Inverter operating status.
- System performance alerts.
What is the Smart Export Guarantee (SEG)?
The Smart Export Guarantee (SEG) allows eligible households in Great Britain to receive payments from participating electricity suppliers for surplus electricity exported to the grid.
If your solar panels generate more electricity than your household needs, you may be able to export the surplus and receive payment under an eligible SEG tariff.
However, payments are not automatic simply because solar panels have been installed.
You generally need to apply to an eligible SEG supplier and meet its requirements. These can include providing an appropriate generation meter reading arrangement, installation documentation and evidence of eligibility.
Your installer can explain which documents you should receive to help with the application.
How Long Does the Solar Panel Installation Process Take in UK?
The time required for solar panel installation depends on the property, system size, equipment availability, weather conditions and any required grid or planning approvals.
A straightforward domestic installation may take around one to two days of on-site installation work. However, the entire project takes longer because surveys, design, equipment delivery and administrative procedures happen before and after the installation.
| Installation stage | Estimated timeframe |
|---|---|
| Initial consultation | 1–2 days |
| Site survey | 1–5 days, depending on scheduling |
| System design and quotation | 2–5 working days |
| DNO process, if required | Depends on application and network assessment |
| Installation preparation | 1–3 days |
| Physical solar installation | Usually 1–2 days |
| Testing and commissioning | During installation or shortly afterwards |
| Final documentation | After relevant testing and registration |
These are indicative planning estimates, not guaranteed service times. Complex projects and approval requirements can extend the schedule.
What factors can delay solar installation?
Several issues can affect the overall installation timeline:
- Poor weather conditions.
- Roof repairs or structural concerns.
- Delays in solar panel or inverter delivery.
- Complex electrical upgrades.
- DNO application requirements.
- Planning restrictions.
- Limited access to the property.
- Additional battery storage or electrical work.
Discussing these factors before accepting a quotation can help you establish a realistic installation schedule.
How Much Does Solar Panel Installation Cost in UK?
The cost of solar panel installation depends on the size of the system, equipment specifications, roof requirements and whether you include battery storage.
There is no single installation price suitable for every property. A smaller household system may require fewer panels, while a larger domestic solar installation with higher electricity consumption may need additional equipment.
Factors that affect solar installation costs
1. Solar panel quantity and capacity
The number of panels and their individual wattage affect the total system capacity and equipment cost.
2. Solar panel technology
Different solar panel technologies have different efficiency ratings, specifications and prices.
3. Inverter selection
Inverter capacity, technology, monitoring features and compatibility influence the overall installation cost.
4. Battery storage
Adding a solar battery increases the initial investment but provides the ability to store surplus electricity for later use.
5. Roof structure and accessibility
Roof condition, pitch, height, scaffolding requirements and installation complexity can affect labour costs.
6. Electrical upgrades
Some properties require additional electrical work to accommodate the new solar energy system.
Before accepting a quotation, compare the equipment specifications, warranties, installation standards and estimated electricity generation rather than considering price alone.
What Should You Do After solar power installation?
Once your solar panels are installed and commissioned, a few simple practices can help you understand and maintain your system.
Monitor electricity generation
Check your solar monitoring application regularly to understand how much electricity your panels generate.
Compare production across different days and seasons to become familiar with normal system performance.
Use electricity during daylight hours
Where practical, run appliances such as washing machines, dishwashers and other electrical equipment during periods of solar generation.
This can help you use more of your own electricity instead of importing it from the grid.
Monitor solar battery performance
If you have battery storage, check its charging and discharging patterns.
Understanding your battery settings can help you make better use of stored electricity.
Arrange periodic inspections
Solar panels generally require relatively little routine maintenance, but periodic checks can help identify potential issues with wiring, mounting equipment, inverter performance and system operation.
Keep installation documents safe
Store your electrical certificates, MCS documentation, warranties, system specifications and inverter manuals in an accessible place.
These documents may be useful when arranging maintenance, making warranty claims or selling your property.
Why Choose Professional Solar Panel Installation UK?
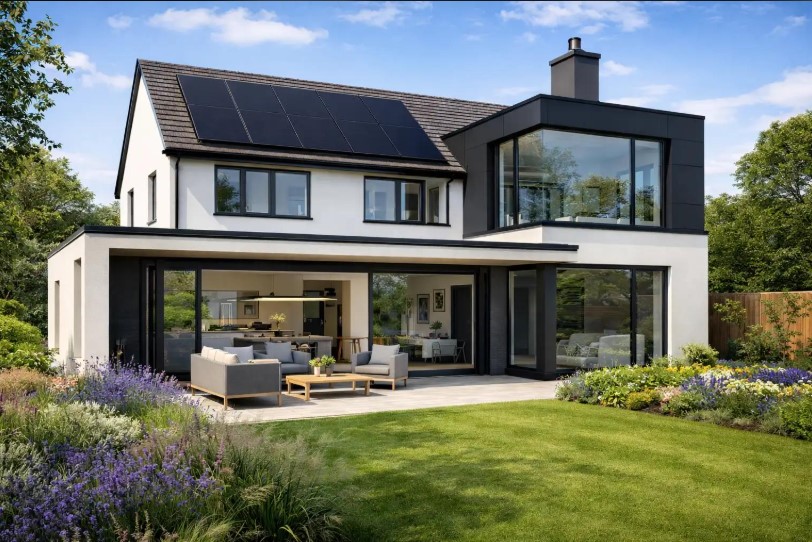
Professional installation is important because solar panels involve roof-mounted equipment, electrical connections and interaction with the electricity distribution network.
Working with an experienced solar installation company helps ensure that each stage is considered before the system is commissioned.
When selecting a solar installer, consider the following:
- Relevant solar PV installation experience.
- Appropriate MCS certification where required.
- Qualified electrical installation professionals.
- Suitable solar panel and inverter products.
- Clear system design and equipment specifications.
- Transparent installation quotations.
- Appropriate product and workmanship warranties.
- DNO application and notification arrangements.
- Electrical testing and commissioning procedures.
- After-installation assistance and monitoring guidance.
Solar Panel Installation Services by Solar Xtra
Solar Xtra provides renewable solar system installation solutions for residential and commercial properties.
Whether you are considering a new rooftop solar PV system & installation of solar pv system and solar panel and battery installation, upgrading your existing energy setup or adding battery storage, the installation should begin with an assessment of your property’s requirements.
Solar Xtra’s solar systems installations services include:
- Solar Panel Installation: Residential and commercial solar PV installation designed around property requirements and electricity consumption.
- Battery Storage Systems: Installation of compatible solar battery systems to store surplus electricity for later use.
- Solar Inverter Installation: Installation and replacement of suitable solar inverters for photovoltaic systems.
- Air Source Heat Pump Installation: Installation of renewable heating systems for suitable residential and commercial properties.
- Solid Wall Insulation: Insulation installation to help reduce heat loss and improve building energy efficiency.
- Solar Monitoring: Monitoring solutions that help property owners understand solar generation and system performance.
- Commercial Solar Installation: Solar energy installation solutions for offices, industrial buildings, warehouses and other commercial premises.
Choosing the right installation company and equipment can make the entire process easier, from the initial property survey to final system handover.
Ready to consider solar panels install for your property? Contact Solar Xtra to discuss your solar installation requirements and arrange an assessment.
FAQs About Solar Panel Installation Process UK
1. How solar panels are installed UK?
The solar panel installation process generally includes an initial consultation, property survey, system design, quotation, DNO application or notification, installation preparation, roof mounting, inverter installation, electrical testing, commissioning and final documentation.
2. How long does it take to install residential solar panel installation UK house?
A typical residential solar panel installation for home solar installation usually takes around one to two days of on-site work. However, the complete project can take several weeks depending on property assessments, equipment availability, DNO approval and installation scheduling.
3. Do I need planning permission to install solar panels in UK?
Many domestic rooftop solar installations fall under permitted development rights. However, restrictions may apply to listed buildings, conservation areas, scheduled monuments and other protected locations. Always check the current rules for your property and local authority.
4. Can solar panels be installed on an east-facing or west-facing roof?
Yes. East-facing and west-facing roofs can both be suitable for solar panel installation. They produce electricity at different times of the day, so the best arrangement depends on your energy consumption and system design.
5. Do I need a solar battery with my solar panels?
No. A solar battery is optional. However, battery storage allows you to store surplus solar electricity generated during daylight hours and use it later, such as during the evening.
6. What happens during a solar panel site survey?
A solar panel site survey involves checking roof condition, orientation, pitch, shading, available installation space, electrical infrastructure, cable routes and potential battery locations. This information helps the installer prepare an appropriate system design.
7. What is the difference between G98 and G99 for solar installations?
G98 generally covers qualifying small-scale electricity generation systems that can be installed and subsequently notified to the DNO. G99 covers systems outside those criteria and normally requires DNO approval before installation or connection.
8. Will solar panels work during cloudy weather in the UK?
Yes. Solar photovoltaic panels can generate electricity during cloudy weather because they use daylight rather than requiring direct sunshine. However, electricity production is generally lower than during bright, sunny conditions.
9. Can I use electricity while solar panels are generating power?
Yes. Your household can use electricity generated by the solar panels while the system is operating. If generation exceeds household demand, surplus electricity may be stored in a compatible battery or exported to the grid.
10. What documents should I receive after solar panel installation?
You should receive relevant electrical installation documentation, system specifications, product warranties, user manuals and applicable DNO records. If the installation qualifies, you should also receive the appropriate MCS certificate and building regulations compliance documentation.
11. Can I add battery storage after installing solar panels?
Yes. Battery storage can often be added to an existing solar PV system. However, compatibility with your existing inverter, electrical configuration, battery specifications and DNO requirements should be assessed before installation.
12. Do solar panels require regular maintenance?
Solar panels generally require limited maintenance. However, homeowners should monitor system performance and arrange professional inspections when necessary to check electrical connections, mounting equipment, inverter operation and any visible damage.
13. Can I receive payments for surplus solar electricity?
Eligible solar panel owners in Great Britain may apply for a Smart Export Guarantee tariff through a participating electricity supplier. Eligibility requirements apply, and payments depend on the supplier’s tariff and the amount of electricity exported. Ofgem+1
14. Is it worth installing solar panels on an older property?
It can be worthwhile, provided the roof structure, electrical infrastructure and available installation space are suitable. Older roofs may need repairs or structural assessment before solar panels can be installed.
15. Can solar panels be installed on commercial properties?
Yes. Solar panels can be installed on suitable offices, warehouses, factories, agricultural buildings and other commercial properties. Commercial installations require system designs based on electricity demand, roof capacity and grid connection requirements.
Want to know what solar would save on your own roof?
Book Your Free Survey